Checklists
- cghove
- Thomas Fredriksen
The trip assistant offers a number of checklists relevant to a trip. Like trips, you can download standard checklists that you find relevant. Several of the checklists have two version: a one use one and a savable one so you can later look at what you entered. The checklists are keyed to the general workflow of a trip.
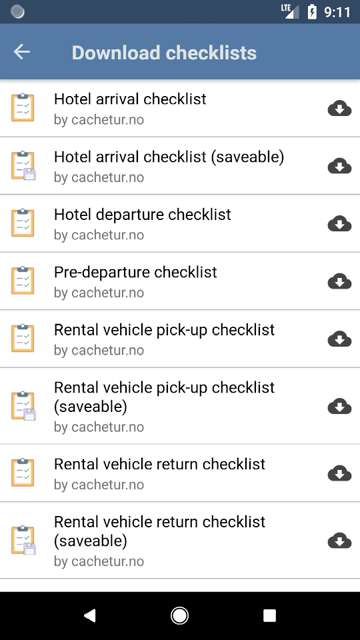
Pre-departure checklist (things to do before leaving home like download GPX, etc.)
Rental vehicle pickup (check for damage, record mileage, reset trip counters, etc)
Rental vehicle pickup (savable) adds more info (make/model, registration, fuel type,...)
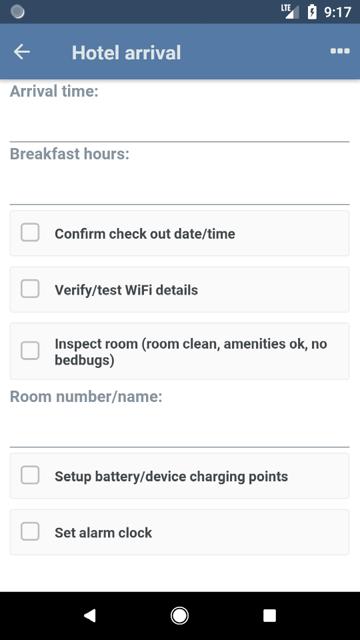
Hotel Arrival (breakfast hours, checkout time, wifi details, inspect room, set up charging stations)
Hotel departure checklist (to make sure you don’t leave anything)
Rental vehicle return checklist (time, mileage, remove all gear, etc.)
From the Trip screen you can choose checklists for just that trip. E.g., the hotel will often vary by day. The same screen offers a menu option to upload all notes and checklists.
Downloading checklists
The app is offline-focused, so you have to download checklists before you can use them in the app. You do this from the Checklist tab in the menu, then by clicking the download icon. Download the checklists you want to use.
If you update the checklist on cachetur.no, you will have to redownload (or update) it in the app to get the changes.
Using checklists from the Checklists page
Checklists used directly from the Checklists page will not be saved. They are meant to be used to quickly check that you haven't forgot anything etc.
Using checklists in a trip
The checklist needs to be saveable in order for it to be used in a trip. You must also download it first (see above).
To add checklists to the trip, click the three dots to open the menu, then click Checklists.
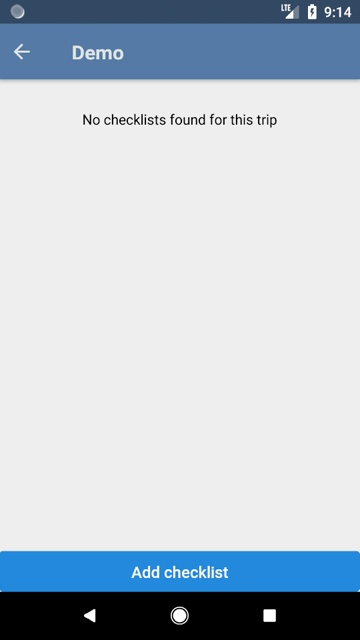
Click Add checklist to add a new checklist. You can add as many as you want, even of the same checklist type.

Give it a name, and click Create. Then click on the checklist to open it.
The checklist is saved automatically when you change any of the items.
You can also upload the entire checklist back to cachetur.no, or upload pictures, from the three dots menu.
Custom Checklists
You can create your own checklists on the cachetur.no web site. For example, you might want your trip packing list to be one.
Go to Tips/template->Checklists and tap “New Checklist”. Then you can set a name, type (single use or savable), a category and if it is associated with a group. Then you can proceed to add fields to your checklist. Fields can be Yes/No, text, number, title, or multi-line text. After adding an element, tap Add Element to add another one until you are done. Your custom lists will show up when you are downloading checklists.